Unity3d and Cloud backend using Azure Mobile Services and Prime31 plugin
Azure Mobile Service is now App Service, please follow the updated tutorial for App Services for Unity3d instead.
Unity game developers looking to publish their games on Windows Store might want to add global/local high-score leaderboards, record user achievements and level progress. For example the ability to save level progress is usually important as users tend to own more than one device and won’t really like the idea of starting over again. With Azure Mobile Services it’s really easy to setup a cloud backend for apps so why not use an Azure Mobile Service to provide a backend for your game? The best part is it will only take a couple of minutes to setup!
Watch getting started with Unity Prime31 Azure plugin running on Windows
- Sign-in to Azure portal. If you don’t have an Azure account yet game developers can register for the Cloud GameDev Offer.
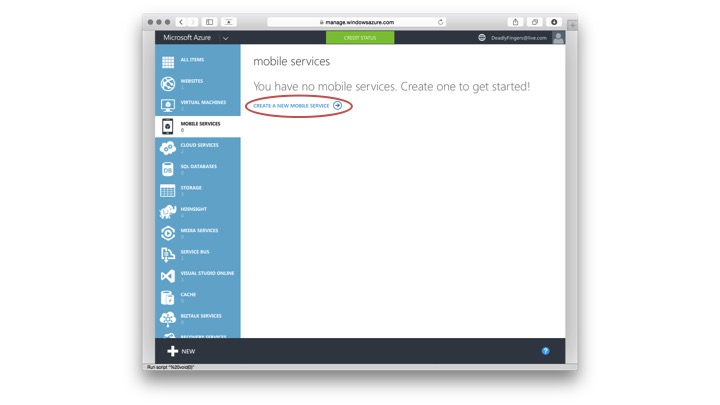
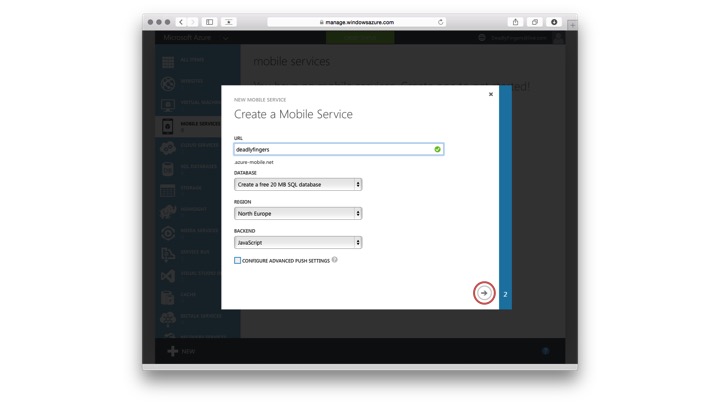
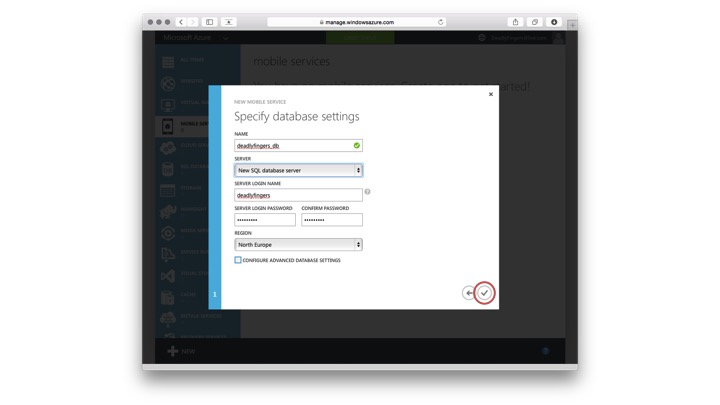
- Create Azure Mobile Service
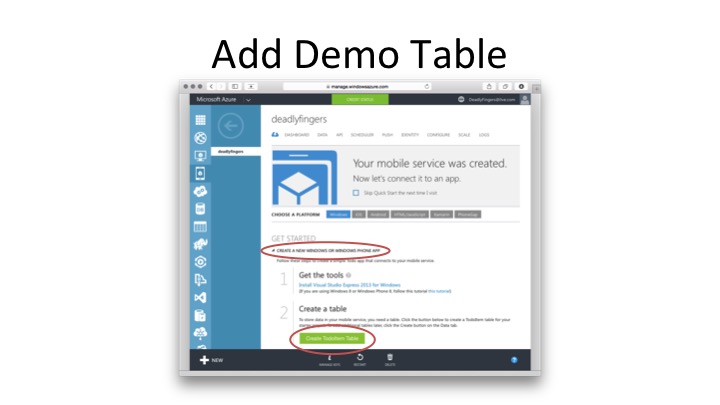
- Create Demo TodoItem Table
- Get Prime31 “Microsoft Azure Plugin” for Windows 8 Store. (free until July 2015)
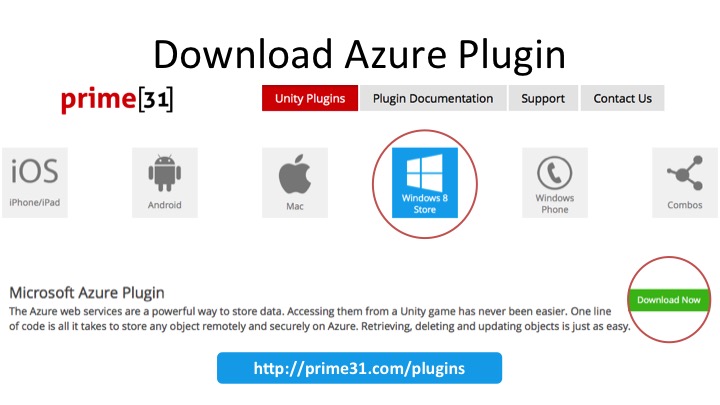 When you click on the “Download Now” button, it will prompt you for your name/email. Submit the form to get the download link to the Unity plugin sent to your email.
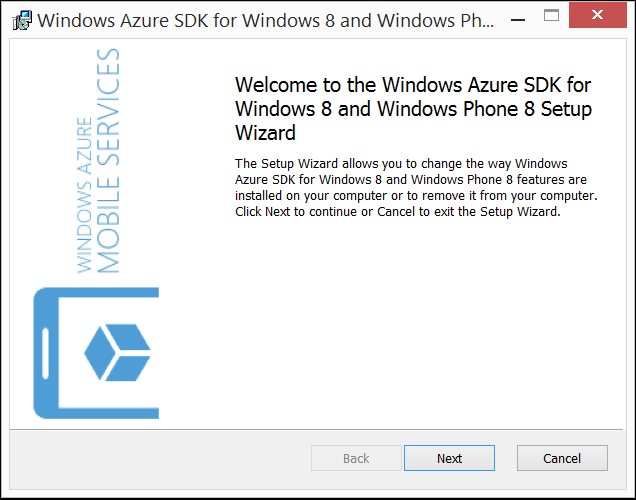
 - Download & install Microsoft Azure Mobile Services SDK.
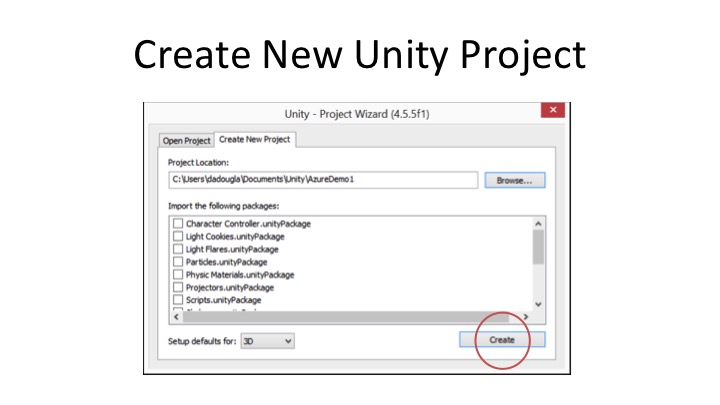
- Create new Unity3d project
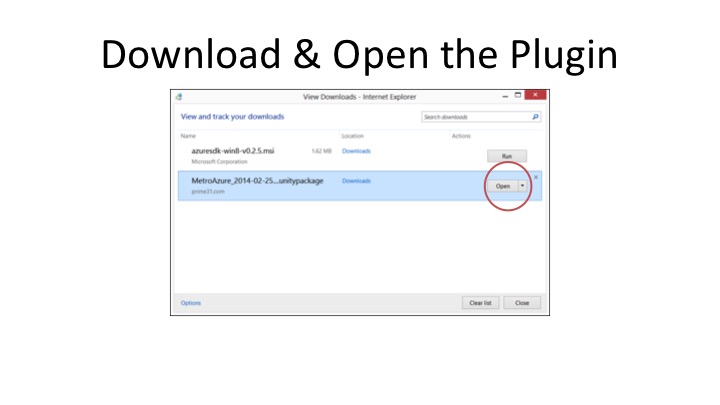
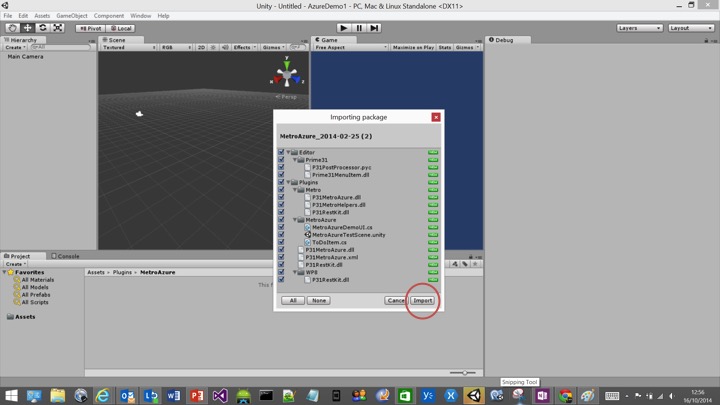
- Download Prime31 plugin from email link and then open the ‘MetroAzure.unitypackage’ package
- Import the Prime31 plugin package.
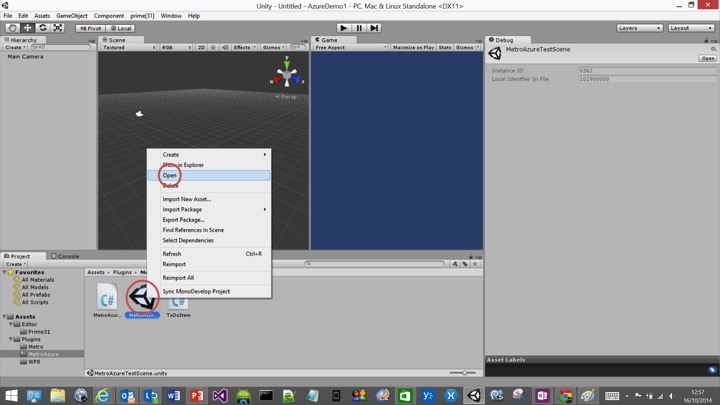
- Open “MetroAzure” Scene
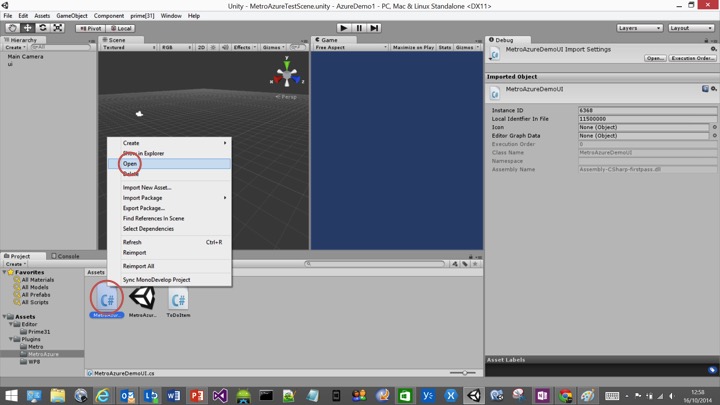
- Open “MetroAzureDemoUI.cs” Script
- Copy & Paste Azure Mobile Services Connection Strings (from Azure Mobile Service portal)
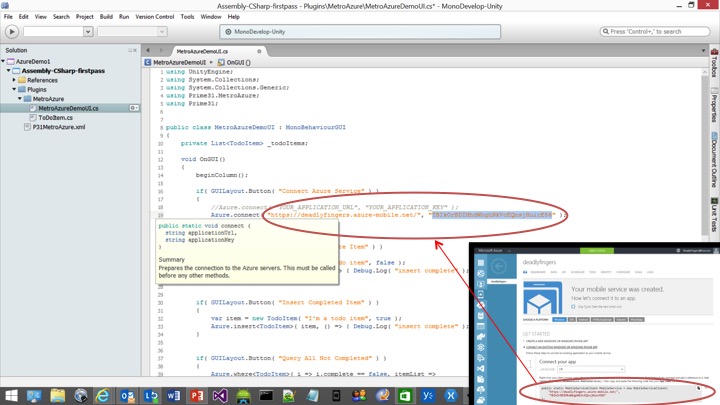
Remember to save changes!
- Select File > Build Settings and target Windows Store platform.

- “Add Current” scene
- Select “Windows Store” and “Switch Platform”
- Select C# Solution and SDK “8.1”
- Select Player Settings
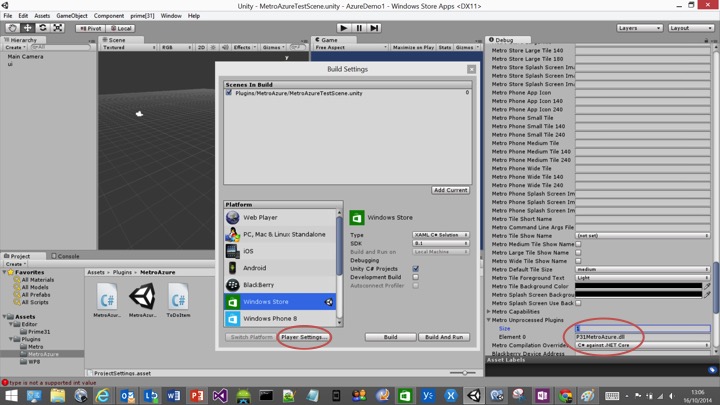 Under “Metro Unprocessed Plugins” set:
Size: 1
Element 0: P31MetroAzure.dll
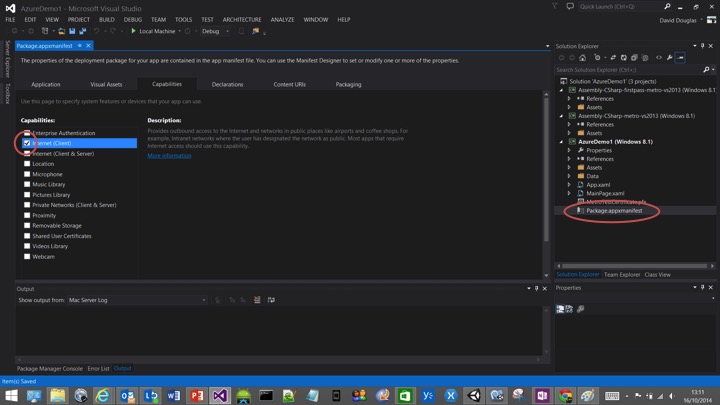
Click Build - Open Windows Store build in Visual Studio

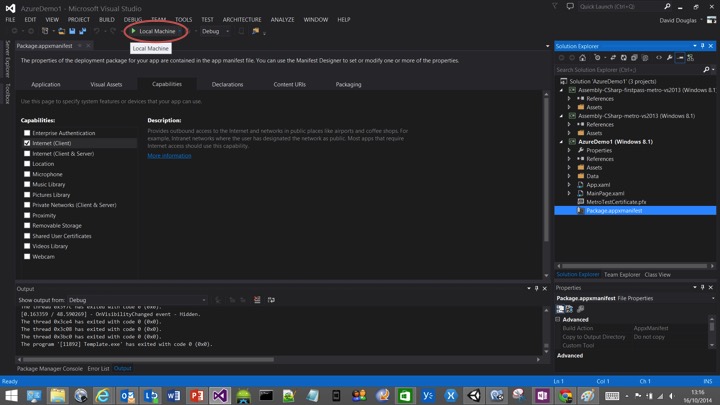
- Open ‘Package.appxmanifest’ manifest to add Internet capabilities.
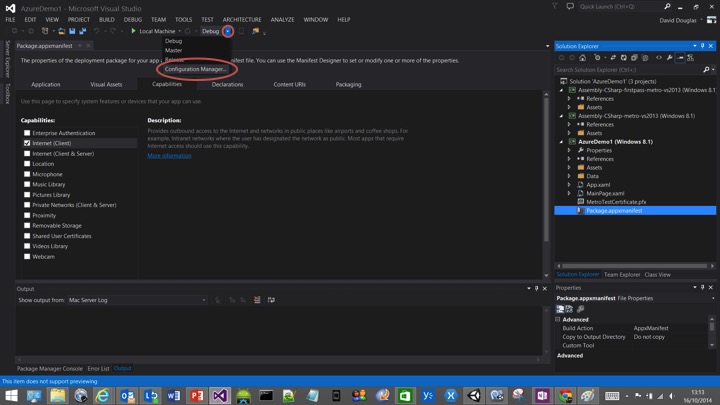
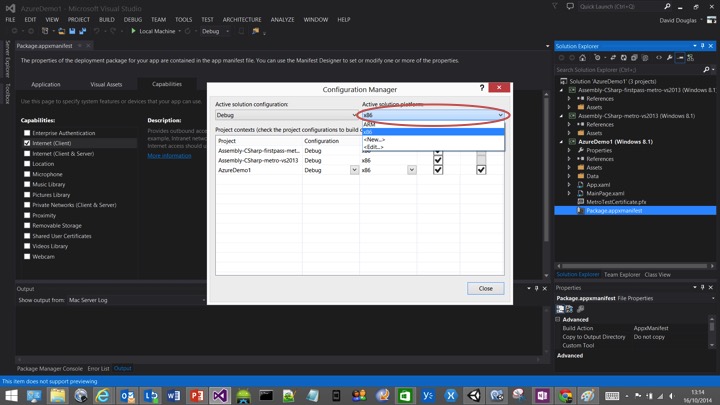
- If necessary open ‘Configuration Manager’ to target current PC hardware.
- Build and run!
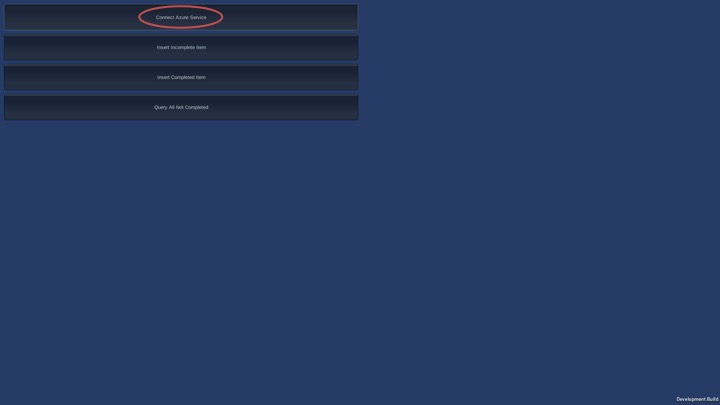 ‘Connect Azure Service’ first, then try adding some items.
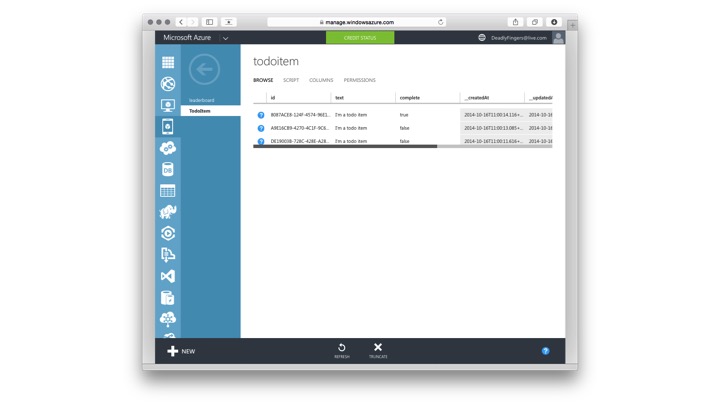 You will see the items appear in your Azure Mobile Service ‘TodoItem’ table.
Ready for the next level?
Check out these links which will show you how to make a leaderboard using Azure Mobile Services & Prime31:
- Mobile Services & Prime31 Video (leaderboard)
- Mobile Services & Prime31 Blog (leaderboard)
- Building Unity projects for Windows 8 and WindowsPhone 8
Additional Resources:
One more thing…
Now is a great time to publish Unity games for Windows!
- Lifetime dev centre means no more recurring annual developer fees!
- Take advantage of the Unity Offer Program for Windows apps to qualify for developer device, Unity Asset Store Voucher, Unity3d Pro License, ID@XBox priority and more!
Share your Unity3d #GameDev with @deadlyfingers