Creating content with Web Components
Many web projects rely on a CMS of some description. The system itself is not important, but rather the content it helps to create. The primary function of a CMS is to enable the creation of content - it should empower content creation. If a new project requires a CMS the question that would tend to spring into a developer’s mind is - can I use an existing CMS already out there, or do I need to build a CMS from scratch for this project? But before that can be answered, perhaps some simple questions need to be asked first.
Asking the simple questions…
Content Management Systems are designed to make it easier to create and publish content. With so many open source systems available there’s a good chance you can find something to do the job you need. Often in the case where additional functionality is required most systems can be extended with some sort of plugin to add that ‘must have’ feature. So why would you ever need to build your own CMS from scratch? This decision should not hang solely upon application’s technical requirements, but rather it depends on who will be using it - we need to ask ourselves who will be the one creating the content? Sounds like a simple question, perhaps even an obvious question but it merits deep thought and careful design decisions. If it is a non-technical audience then displaying a bunch of features that the user doesn’t need is distracting, in the worst case intimidating, ultimately leading to a poor user experience. What if you could design something from scratch so it could be tailored exactly to fit the user’s requirements? Imagine if the UI only contained the functions needed without extraneous menu options or clutter and was designed to maximise ease of use and content creation.
Starting from scratch
Recently I was working on the ‘Badge Builder’ project which required a CMS to author quiz content. But rather than manipulate some existing CMS or plugin that might roughly fit the use case we wondered if we could design and build our own bespoke CMS components during a one week hack. At the very outset of the project we wanted to build a system that would be easy to use and quick to create content regardless of the technical abilities of the user.
The main problem with building all the CMS components from scratch would be the time required - with only three weeks. However there are a number of things that I feel made the most of the development time we had.
Web Components
By leveraging Web Components we could make our own custom HTML elements for each quiz and content element. Common behaviours could also be shared across elements.
Polymer
During our one week hack the Polymer Starter Kit was a good kick start and saved time by setting up a stack of things like node and bower dependencies. Polymer provides a nice UI kit for web apps which can be separately imported for use. The PSK boilerplate is now available through Polymer-cli.
SASS and Foundation grid
Because nobody likes working with thousands of lines of CSS, SASS can reduce physical line count and can be easily split into separate files which makes it easier to manage in source controlled projects. Also SASS makes it easy to import Foundation Grid for responsive design.
Live reload of server and client
A combination of Nodemon and BrowserSync allowed us to see live updates of all changes made on server and client side. This combo is essential to fine tune the interface and user experience and is my personal ‘must have’ for designing and developing a web app project.
Document database
Saving content as a JSON object allowed greater freedom developing components on client side.
Polymer Web Components
Developing Web Components for each quiz element and content element felt very intuitive. A quiz could be built using a combination of a number of individual quiz and content components.
Quiz components:
- Single choice
- Select the correct answer from a number of options
- Multiple choice
- Select one or more answers that apply from a number of options
- Ordered list
- Move options into their correct order using drag and drop
- Groups
- Move options into their correct groups using drag and drop
- Keywords
- Type keywords to answer requirements
- Comments
- Type a number of words to answer
Content components:
- HTML
- HTML formatted content
- Embedded media
- Embedded video player using iframe
- Link
- External url
- Section
- Split quiz into sections
Reusable elements
To create reusable Web Components you can use the Polymer Seed Element which sets up a test, demo and documentation page. But rather than have the overhead of managing and publishing multiple custom elements during development, it was faster to have the custom elements bundled with the project - the idea being once we had finished the project we could extract and publish them as separate elements. (One ‘gotya’ to be aware of is that custom element names need to be hyphenated.)
All the Web Components for the Badge Builder needed to operate on two different views - the editor (CMS) screen and the interactive viewer (quiz) screen.
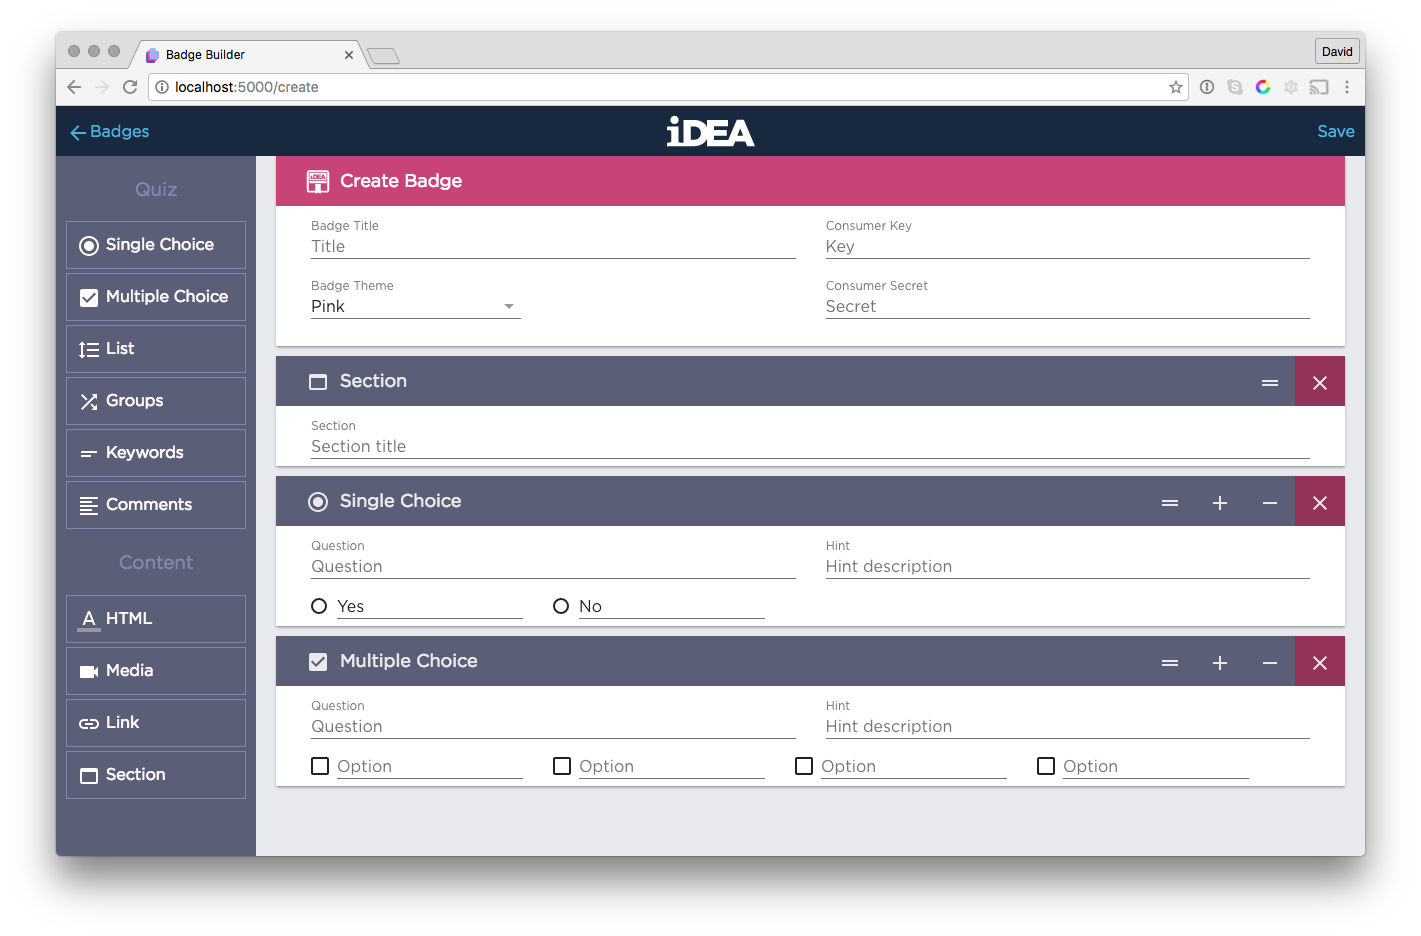
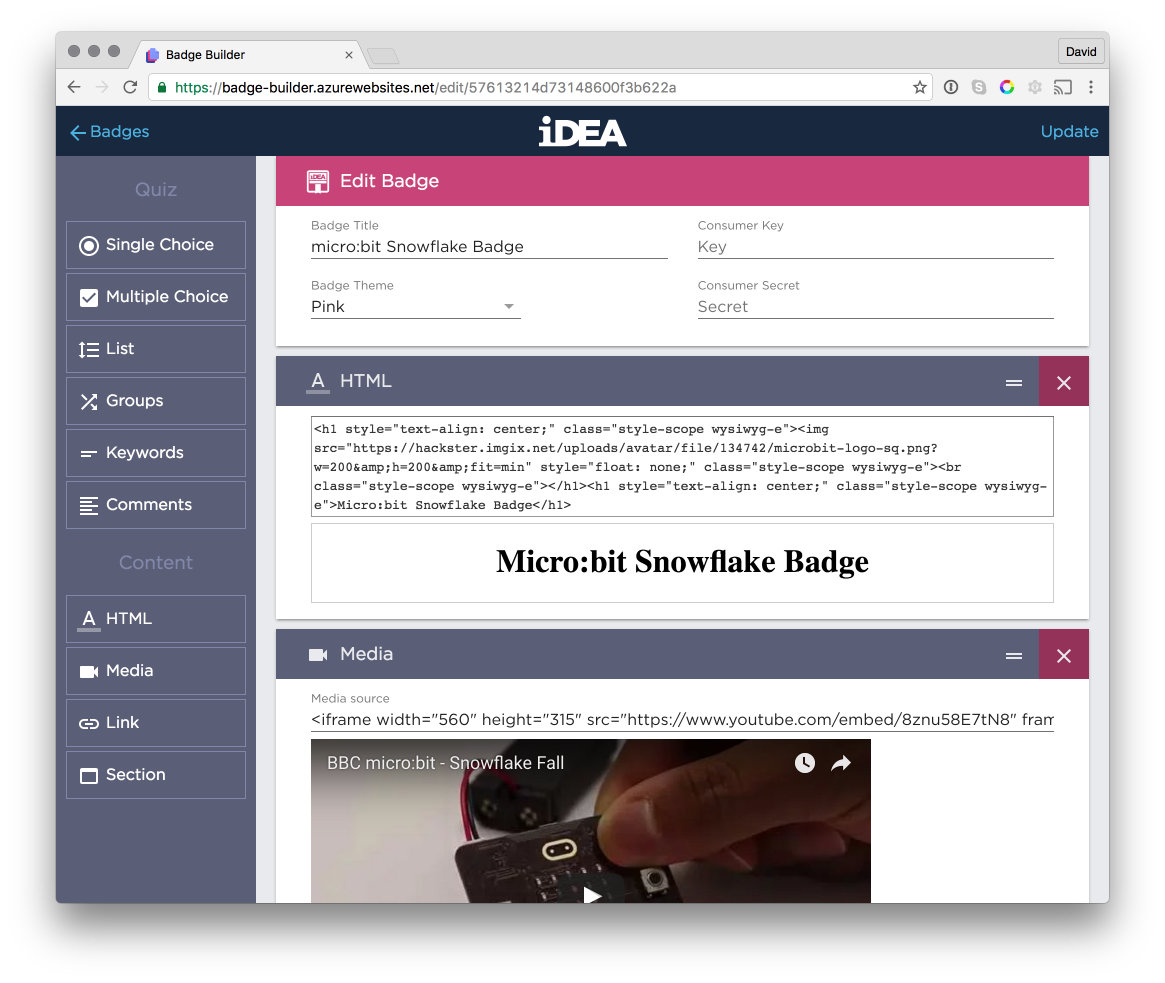
Badge Builder Editor (CMS)
Badge Builder Viewer (quiz)
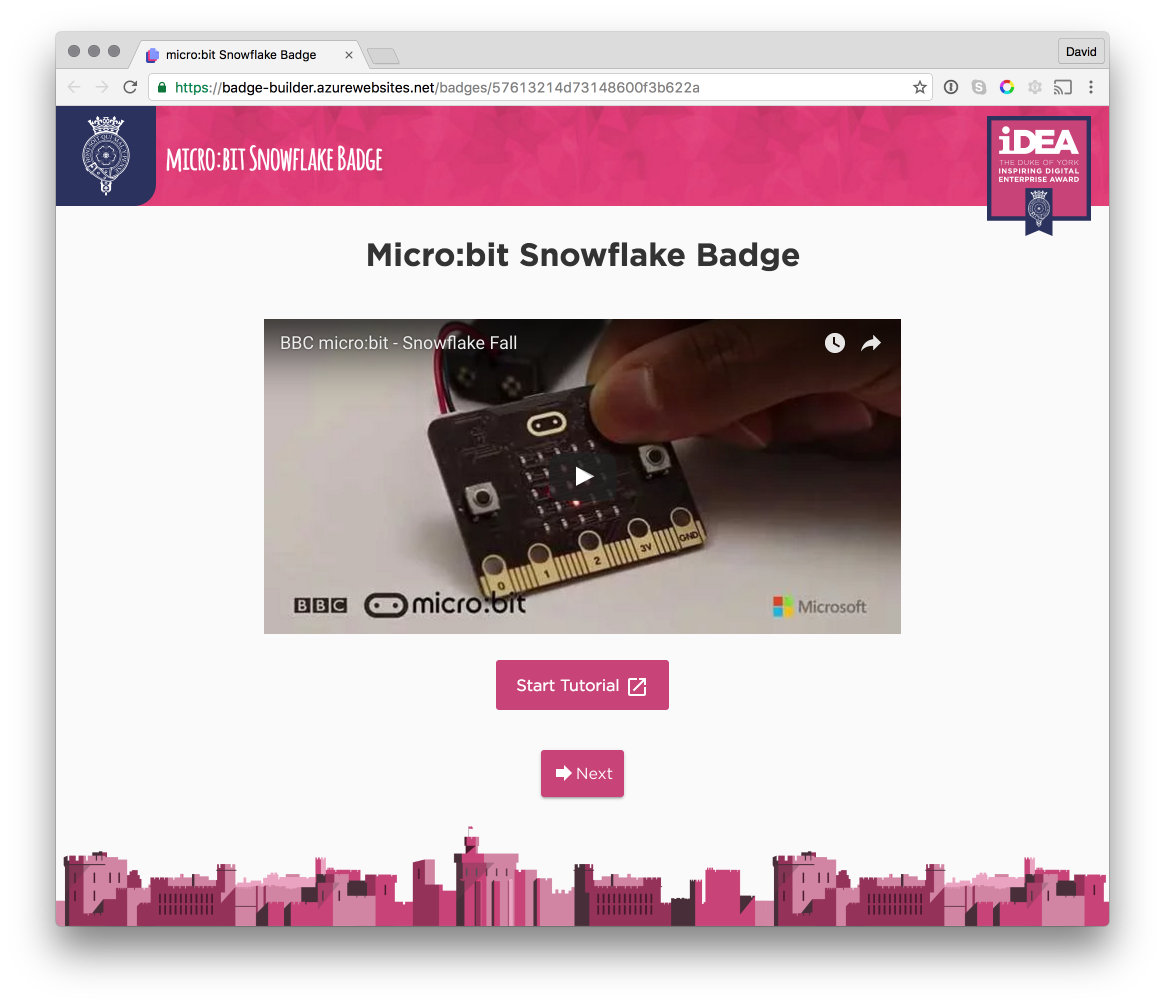
For the editor we wanted the quiz elements to be pretty WYSIWYG so for the most part the same element was used for the editor and viewer. The Polymer dom-if template was a good way to render the parts unique to each view in this case.
Displaying dynamic content using Web Components
To render the dynamic components to the page an empty placeholder was used.
<div id="components"></div>
The quiz content was loaded with Polymer’s iron-ajax element and the array of content was parsed in the response handler using a switch statement to check against specific element types.
for (var i=0; i<elements.length; i++) {
  var element = elements[i];
  switch(element.elementType) {
    case "content-html":
      this.addHTML(element.text);
    break;
    case "content-video":
      this.addVideo(element.embededURI);
      break;
    case "content-button":
      this.addButton(element.buttonURL, element.buttonText);
      break;
    case "content-section":
      this.addContentSection(element.title);
      break;
    case "quiz-short-input":
      this.addQuizShortInput(element._id, element.question, element.answerKeywords, element.answer, element.hintText, element.showHint);
      break;
    case "quiz-long-input":
      this.addQuizLongInput(element._id, element.question, element.answer, element.wordLimit, element.hintText, element.showHint);
      break;
    case "quiz-list-groups":
      this.addQuizListGroups(element._id, element.question, element.answer, element.hintText, element.showHint);
      break;
    default:
      this.addQuizElementType(element.elementType, element._id, element.question, element.options, element.answer, element.hintText, element.showHint);
      break;
  }
}
Most elements are unique and are handled separately, apart from the default case which for elements that share exactly the same object properties. In this case the element type is passed to the function to create the element and set the properties by using the `document.createElement` method. (The other option is to define custom constructor but it's not necessary.)
addQuizElementType: function(elementType, id, question, options, answer, hintText, showHint) {
  var el = document.createElement(elementType); // string should be a hyphenated web component
  el._id = id;
  el.question = question;
  el.options = options;
  el.answer = answer;
  el.hintText = hintText;
  el.showHint = showHint;
  this.addElement(el); // add element to the DOM
}
Once the element has been created and properties set it still needs added to the DOM. This is handled with `appendChild(element)` Javascript method. Notice that we can use Polymer's ‘`$`’ selector to append children to our div tag with `id="components"`. Because the elements are added dynamically in Javascript and therefore manipulating the DOM it is necessary to wrap the selector using the Polymer DOM API.
addElement: function (element, isCreated) {
  element.edit = true;
  element.classList.add("draggable");
  Polymer.dom(this.$.components).appendChild(element);
}
The add element method was used when loading saved content, but also when adding new elements to the page. One usability tweak is to have the page scroll down to show a newly added component. The problem with scrolling down here is that height of the new element will not be known until the DOM has updated, so we will need to add a listener to handle the `dom-change` event. Now we can scroll down to see the element we have added.
scrollDown: function(){
  window.scrollTo(0, document.body.scrollHeight);
},

listeners: {
  'dom-change' : "scrollDown"
}
Saving dynamic content using Web Components
To save the dynamic content for each element I would need to be able to get the content as JSON. A nice way to handle this for all components is to use a shared behaviour. This would hold the `_id` property assigned by the database and also assign the element's type using the built-in method `this.localName`.
<link rel="import" href="../../../bower_components/polymer/polymer.html">
<script>
  window.QuizBehaviors = window.QuizBehaviors || {}; // Behavior namespace
  /** @polymerBehavior QuizBehaviors.DataModelBehavior */
  QuizBehaviors.DataModelBehaviorImpl = {

    properties: {
      /**
       * The `id` of the element for database
       * @type {string}
       */
      _id: {
        type: String,
        value: function() {
          return "";
        }
      },

    },

    /**
     * Returns the JSON data model for saving.
     * NB: To capture more properties the `getData` method can be overridden by the custom element.
     */
     getData: function() {
       return {
         _id : this._id,
         elementType : this.localName
       };
     }

  };

  QuizBehaviors.DataModelBehavior = [
    QuizBehaviors.DataModelBehaviorImpl
  ];
</script>
Finally, when changes need to be saved it's just a case of returning a list of all our custom elements and grabbing the data as JSON using the element's `getData` behaviour. This data array can then be posted using Polymer's `iron-ajax` element for saving to the database.
getElements: function(){
  return Polymer.dom(this.$.components).querySelectorAll('.draggable');
},

getElementsData: function(){
  var elementsData = [];
  var elements = this.getElements();
  var i = elements.length;
  while(i--){
    var el = elements[i];
    var data = el.getData();
    elementsData.unshift(data);
  }
  return elementsData;
}
You can find the Badge Builder project on github and if you want to know more you can read the full code story on the Microsoft Developer blog.